Toggle navigation
Home
Blog
Gear
About
Landscape & Seascape Photography
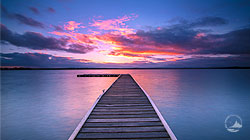
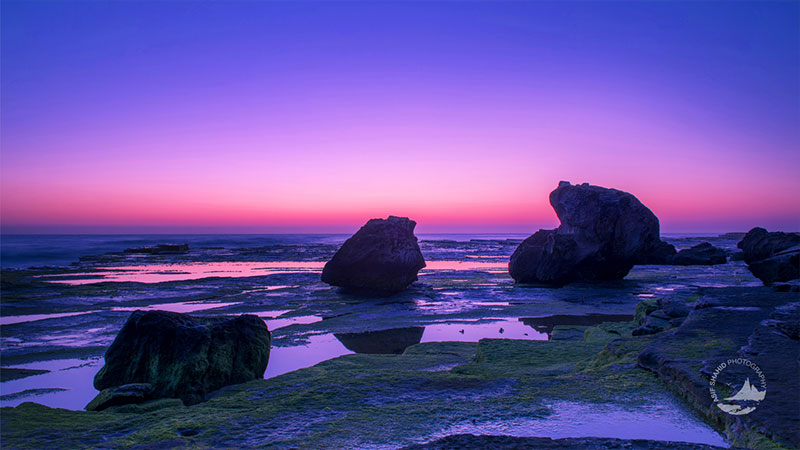
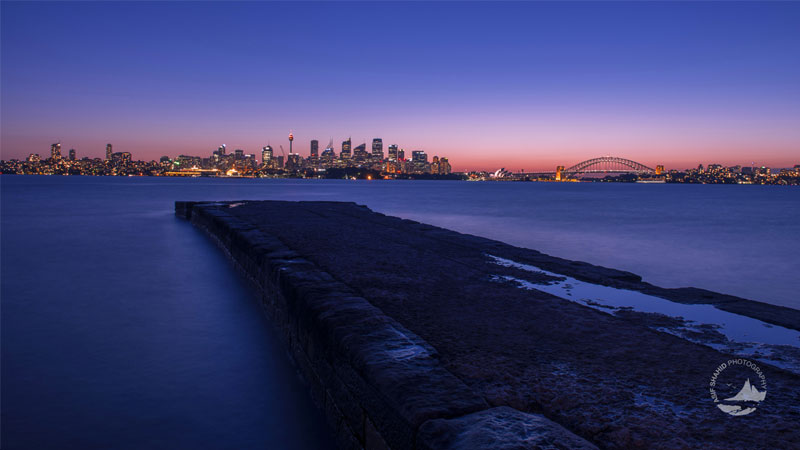
Catherine Hill Bay Sunset
×
Download (3.6K)
1920x1080 (789)
2560x1440 (783)
1366x768 (1003)
1440x900 (1032)
Catherine Hill Bay Sunset...
Download (3.6K)
1920x1080 (789)
2560x1440 (783)
1366x768 (1003)
1440x900 (1032)
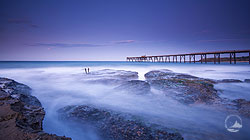
Osborne Park Jetty
×
Download (3.3K)
1920x1080 (931)
1366x768 (1013)
2560x1440 (645)
1440x900 (747)
Osborne Park Jetty...
Download (3.3K)
1920x1080 (931)
1366x768 (1013)
2560x1440 (645)
1440x900 (747)
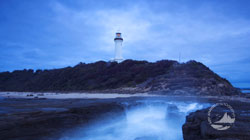
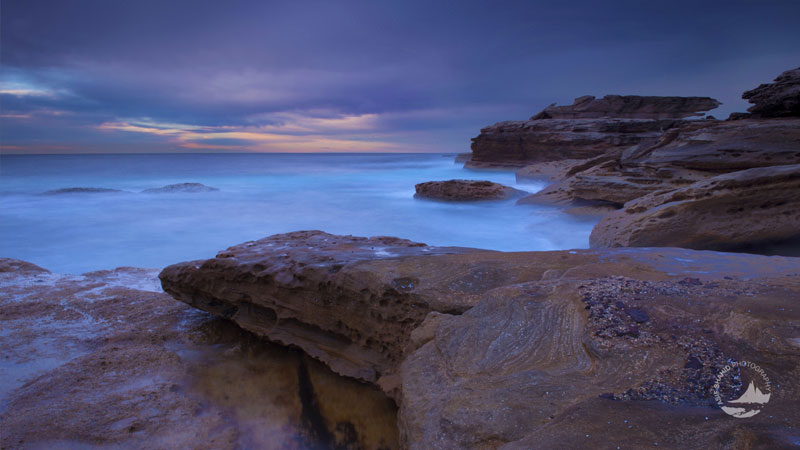
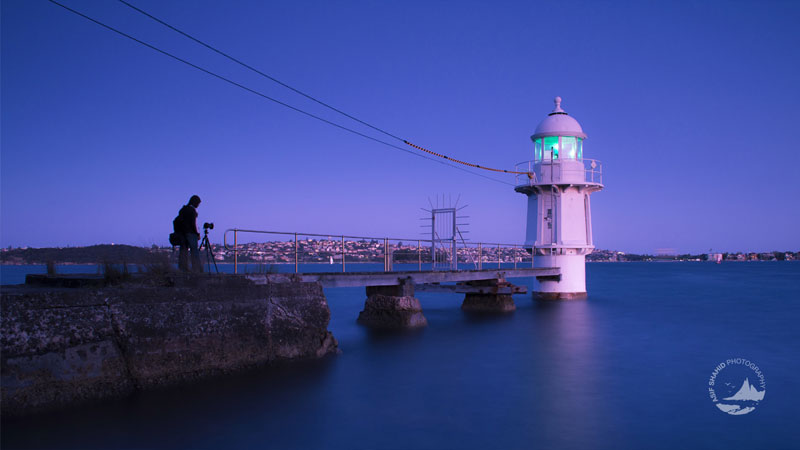
Norah Head Lighthouse
×
Download (3.6K)
1920x1080 (776)
2560x1440 (955)
1440x900 (1182)
1366x768 (733)
Norah Head Lighthouse...
Download (3.6K)
1920x1080 (776)
2560x1440 (955)
1440x900 (1182)
1366x768 (733)
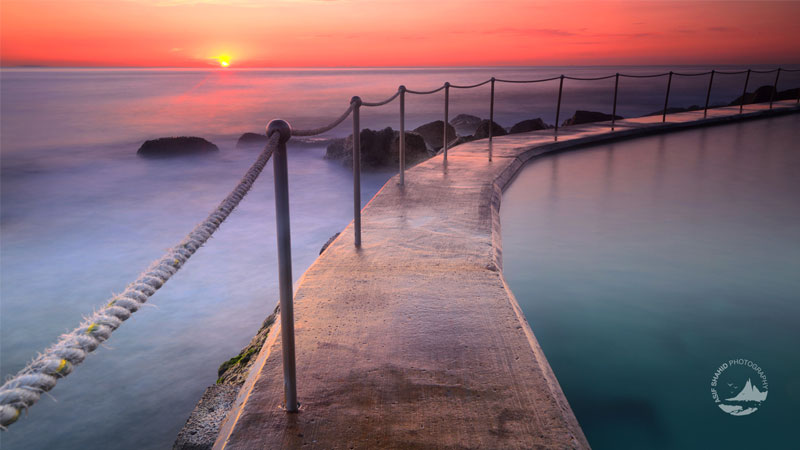
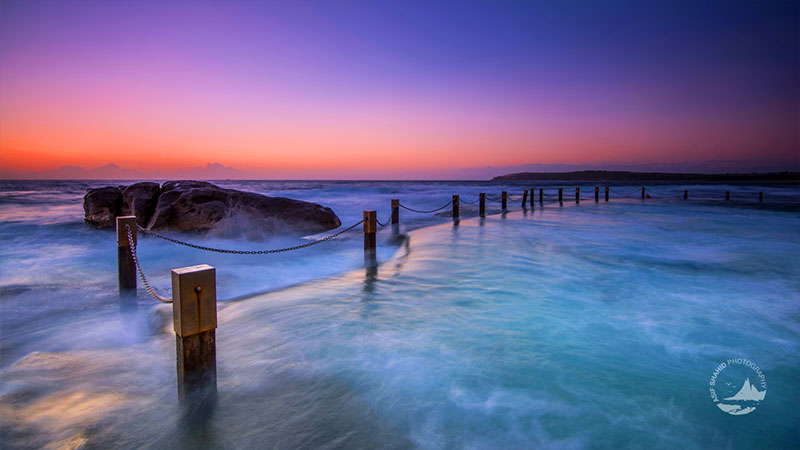
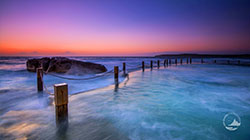
Bronte Beach Rock Pool
×
Download (4.3K)
2560x1440 (1003)
1920x1080 (1056)
1366x768 (1080)
1440x900 (1149)
Bronte Beach Rock Pool...
Download (4.3K)
2560x1440 (1003)
1920x1080 (1056)
1366x768 (1080)
1440x900 (1149)
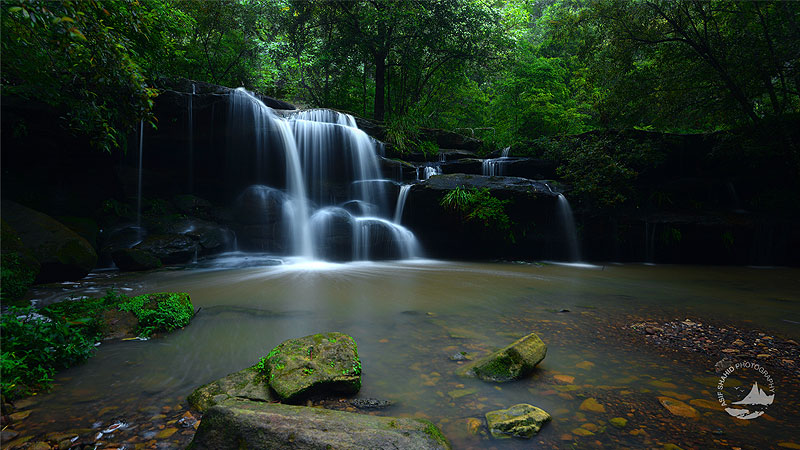
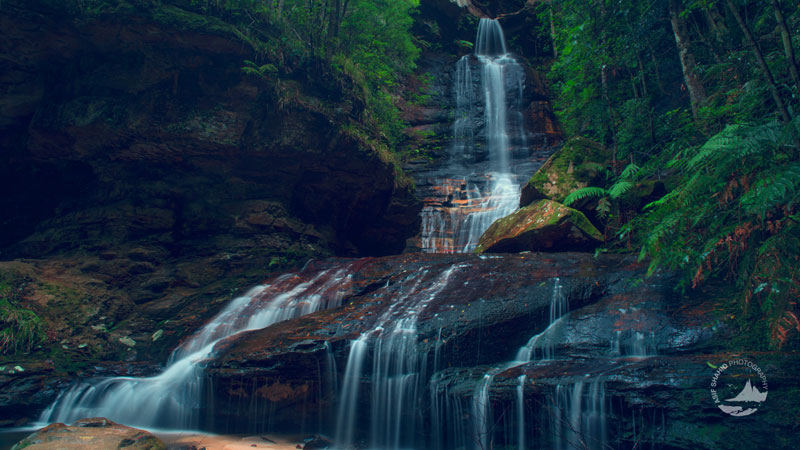
Hunts Creek Waterfall, Carlingford
×
Download (4.1K)
1920x1080 (788)
1440x900 (1083)
2560x1440 (1095)
1366x768 (1102)
Hunts Creek Waterfall, Ca...
Download (4.1K)
1920x1080 (788)
1440x900 (1083)
2560x1440 (1095)
1366x768 (1102)
Bombo Headland Quarry, Kiama
×
Download (3.9K)
1920x1080 (1003)
1440x900 (921)
1366x768 (957)
2560x1440 (1039)
Bombo Headland Quarry, Ki...
Download (3.9K)
1920x1080 (1003)
1440x900 (921)
1366x768 (957)
2560x1440 (1039)
Autumn at Matcham
×
Download (4.4K)
2560x1440 (936)
1440x900 (1083)
1920x1080 (1026)
1366x768 (1381)
Autumn at Matcham...
Download (4.4K)
2560x1440 (936)
1440x900 (1083)
1920x1080 (1026)
1366x768 (1381)
Empress Falls, View 2
×
Download (4.1K)
1440x900 (933)
1920x1080 (1121)
2560x1440 (1037)
1366x768 (1023)
Empress Falls, View 2...
Download (4.1K)
1440x900 (933)
1920x1080 (1121)
2560x1440 (1037)
1366x768 (1023)
Sylvania Waters Jetty, Sydney
×
Download (3.5K)
1440x900 (855)
2560x1440 (944)
1366x768 (761)
1920x1080 (947)
Sylvania Waters Jetty, Sy...
Download (3.5K)
1440x900 (855)
2560x1440 (944)
1366x768 (761)
1920x1080 (947)
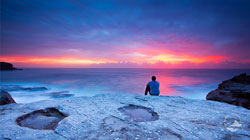
Little Bay Sunrise
×
Download (4.6K)
1920x1080 (1245)
2560x1440 (1343)
1366x768 (966)
1440x900 (1085)
Little Bay Sunrise...
Download (4.6K)
1920x1080 (1245)
2560x1440 (1343)
1366x768 (966)
1440x900 (1085)
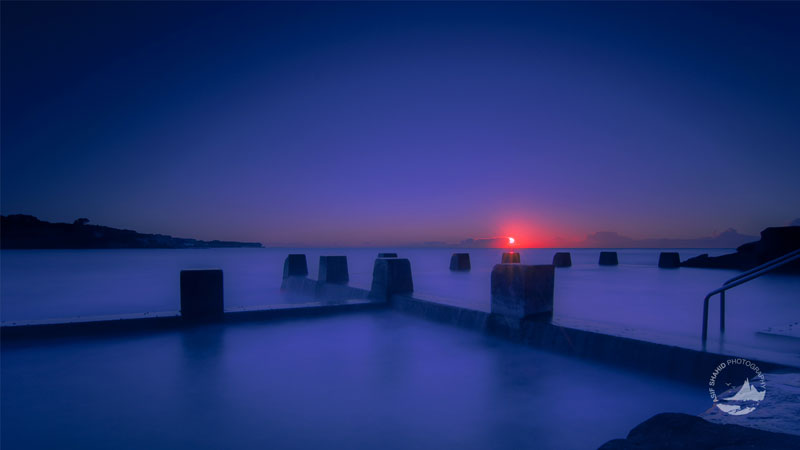
Mahon Pool, Maroubra
×
Download (5K)
1440x900 (1355)
2560x1440 (1305)
1920x1080 (1265)
1366x768 (1086)
Mahon Pool, Maroubra...
Download (5K)
1440x900 (1355)
2560x1440 (1305)
1920x1080 (1265)
1366x768 (1086)
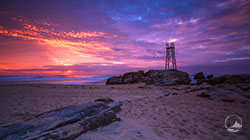
Shark Tower, Redhead, Sydney
×
Download (4.9K)
2560x1440 (1264)
1366x768 (1262)
1920x1080 (1137)
1440x900 (1245)
Shark Tower, Redhead, Syd...
Download (4.9K)
2560x1440 (1264)
1366x768 (1262)
1920x1080 (1137)
1440x900 (1245)
Turimetta Beach, Sydney
×
Download (5.3K)
2560x1440 (1249)
1440x900 (1369)
1920x1080 (1276)
1366x768 (1382)
Turimetta Beach, Sydney...
Download (5.3K)
2560x1440 (1249)
1440x900 (1369)
1920x1080 (1276)
1366x768 (1382)
Oceanides, Manly, Sydney
×
Download (4.9K)
2560x1440 (1034)
1366x768 (1331)
1920x1080 (1245)
1440x900 (1247)
Oceanides, Manly, Sydney...
Download (4.9K)
2560x1440 (1034)
1366x768 (1331)
1920x1080 (1245)
1440x900 (1247)
Long Reef, Sydney
×
Download (5.3K)
1366x768 (1590)
1920x1080 (1078)
2560x1440 (1369)
1440x900 (1229)
Long Reef, Sydney...
Download (5.3K)
1366x768 (1590)
1920x1080 (1078)
2560x1440 (1369)
1440x900 (1229)
Shipwreck Front View, Homebush Bay, Sydney
×
Download (5.1K)
1366x768 (1267)
1920x1080 (1416)
1440x900 (1297)
2560x1440 (1162)
Shipwreck Front View, Hom...
Download (5.1K)
1366x768 (1267)
1920x1080 (1416)
1440x900 (1297)
2560x1440 (1162)
Shipwreck, Homebush Bay, Sydney
×
Download (5.2K)
1440x900 (1271)
1366x768 (1414)
2560x1440 (1295)
1920x1080 (1265)
Shipwreck, Homebush Bay, ...
Download (5.2K)
1440x900 (1271)
1366x768 (1414)
2560x1440 (1295)
1920x1080 (1265)
Little Bay, Sydney
×
Download (5.1K)
1920x1080 (1359)
2560x1440 (1147)
1440x900 (1403)
1366x768 (1192)
Little Bay, Sydney...
Download (5.1K)
1920x1080 (1359)
2560x1440 (1147)
1440x900 (1403)
1366x768 (1192)
Oceanides Sculpture, Manly, Sydney
×
Download (3.8K)
1920x1080 (933)
2560x1440 (740)
1440x900 (1032)
1366x768 (1051)
Oceanides Sculpture, Manl...
Download (3.8K)
1920x1080 (933)
2560x1440 (740)
1440x900 (1032)
1366x768 (1051)
Coogee Rock Pool, Sydney
×
Download (5.2K)
1920x1080 (1276)
2560x1440 (1234)
1366x768 (1391)
1440x900 (1287)
Coogee Rock Pool, Sydney...
Download (5.2K)
1920x1080 (1276)
2560x1440 (1234)
1366x768 (1391)
1440x900 (1287)
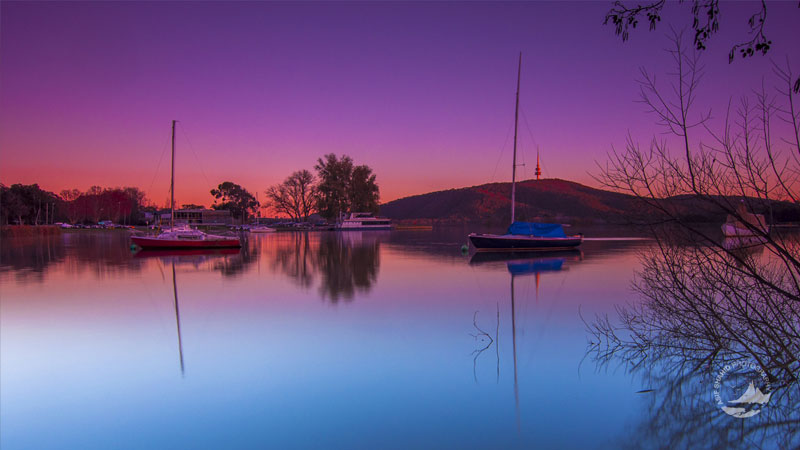
Lotus Bay, Canberra
×
Download (5.7K)
1366x768 (1441)
1920x1080 (1580)
1440x900 (1398)
2560x1440 (1268)
Lotus Bay, Canberra...
Download (5.7K)
1366x768 (1441)
1920x1080 (1580)
1440x900 (1398)
2560x1440 (1268)
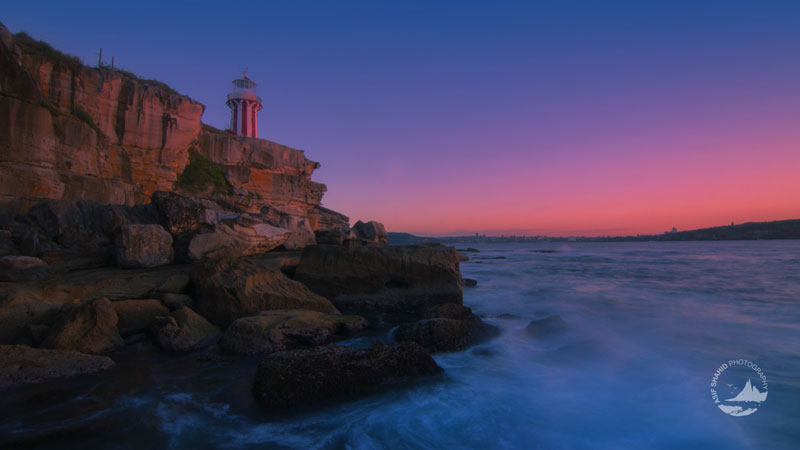
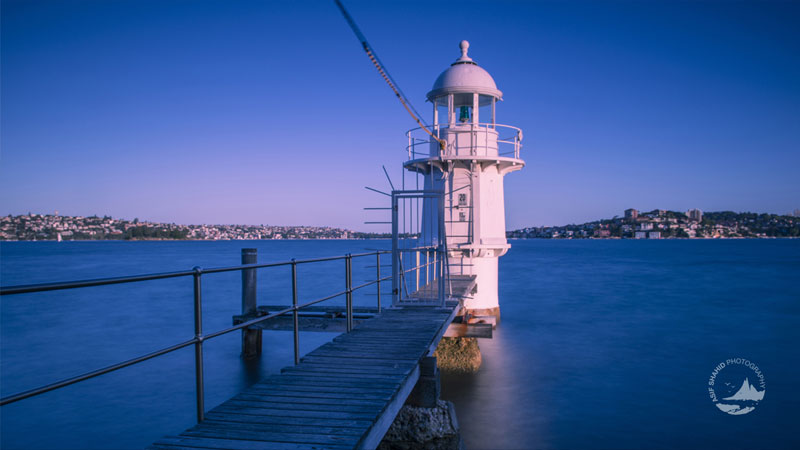
Hornby Lighthouse, Sydney
×
Download (4.3K)
2560x1440 (873)
1366x768 (1250)
1920x1080 (1035)
1440x900 (1105)
Hornby Lighthouse, Sydney...
Download (4.3K)
2560x1440 (873)
1366x768 (1250)
1920x1080 (1035)
1440x900 (1105)
Bradleys Head Lighthouse- View 2, Sydney
×
Download (3.4K)
2560x1440 (936)
1366x768 (686)
1920x1080 (720)
1440x900 (1044)
Bradleys Head Lighthouse-...
Download (3.4K)
2560x1440 (936)
1366x768 (686)
1920x1080 (720)
1440x900 (1044)
Bradleys Head Lighthouse, Sydney
×
Download (3.9K)
1440x900 (961)
1920x1080 (982)
2560x1440 (784)
1366x768 (1171)
Bradleys Head Lighthouse,...
Download (3.9K)
1440x900 (961)
1920x1080 (982)
2560x1440 (784)
1366x768 (1171)
Bradleys Head Amphitheatre, Sydney
×
Download (3.3K)
1920x1080 (705)
1366x768 (933)
2560x1440 (730)
1440x900 (912)
Bradleys Head Amphitheatr...
Download (3.3K)
1920x1080 (705)
1366x768 (933)
2560x1440 (730)
1440x900 (912)
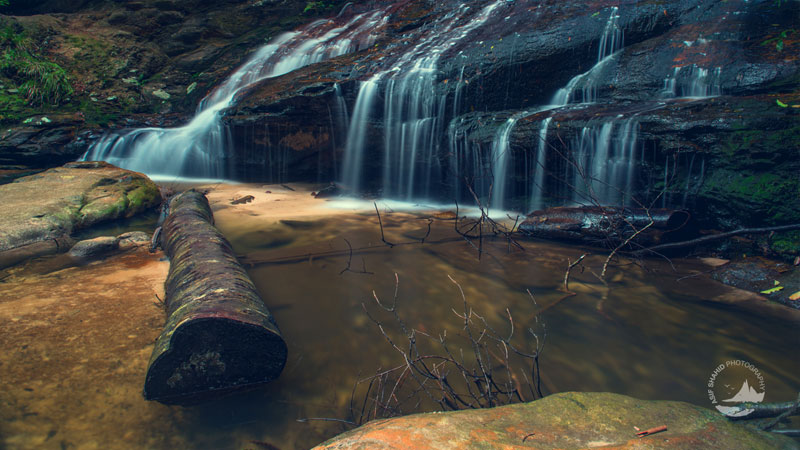
Empress Falls, Sydney
×
Download (4.6K)
1440x900 (1222)
1920x1080 (889)
2560x1440 (1377)
1366x768 (1139)
Empress Falls, Sydney...
Download (4.6K)
1440x900 (1222)
1920x1080 (889)
2560x1440 (1377)
1366x768 (1139)
Filter by Tags
Australia,
Autumn,
Camera Repair,
Canberra,
Central Coast Area,
CPL,
Daryl Benson 0.9 Reverse Grad,
Five Star Camera Repairs,
HDR,
Jetty,
Lee .9 GND Soft,
Lee .9 ND,
Lee Big Stopper,
Lighthouse,
Long Reef,
Mist,
NIK Collection,
Nikon 16-35,
Nikon 24-70,
Nikon D800,
Nikon D90,
Nisi CPL,
Raya Pro,
Rock Pool,
Shipwreck,
Sunrise,
Sunset,
Sydney,
, Tokina 11-16
, Waterfalls